





Your Pocket-Sized Guide to Using an eSIM for Travel
Most travelers don’t realize their phone’s SIM tray is already obsolete—eSIM for travel lets you switch to a local data plan in under two minutes, without ever touching a physical card. You simply scan a QR code from a provider, and your device instantly connects to regional networks, killing roaming fees while keeping your original number active for calls and texts. It’s the fastest, most direct way to stay online abroad: buy, scan, and go—no store visits, no swapping cards, no waiting. Demand it on your next trip, and your connectivity becomes as effortless as your itinerary.
What Exactly Is an eSIM and How Does It Work When You’re Abroad?
An eSIM is a tiny, embedded chip inside your phone that acts as a digital SIM card, letting you download a travel plan instead of swapping physical plastic. Before you depart, you scan a QR code from a travel eSIM provider, which installs a local carrier profile onto your device. When you land abroad, your phone automatically connects to that regional network, bypassing your home carrier’s exorbitant roaming fees. You manage everything through your phone’s settings—toggling between your primary line and the travel eSIM, and topping up data with another QR code if you run low.
The moment you arrive, you’re live on a local network without ever visiting a shop or finding a Wi-Fi hotspot.
Since the eSIM stays embedded, you can switch countries by simply downloading a new profile, keeping your original number active for calls and texts.
The Quick Tech Breakdown: No Physical SIM Card Needed
The quick tech breakdown centers on the embedded SIM chip soldered directly into your device’s motherboard. Unlike a plastic card, this chip uses a rewritable profile that you download via QR code or app, meaning you can switch carriers without touching a tray. For travel, this eliminates the need to source a local SIM at the airport; you simply install a regional data plan before departure. The profile stores your new number and carrier credentials while your physical slot remains free for a home SIM. **This software-based switching is the core advantage** because it allows instant activation and multiple stored profiles.
Does removing the physical SIM affect signal quality or speed? No. The embedded chip connects to the same cellular towers as a traditional card, so performance is identical.
How Data Plans Get Delivered to Your Phone Over Wi-Fi
When you purchase an eSIM travel plan, the profile is delivered to your phone over Wi-Fi via a QR code or a direct app link. After scanning, your device securely downloads the profile data—including the carrier’s network credentials—and installs it into the eSIM chip. The delivery over Wi-Fi avoids using your current cellular data, so the activation process consumes zero megabytes from your existing plan. Some providers also push the profile through a server-side push notification, but only if your phone is already connected to a stable Wi-Fi network. The profile remains encrypted until the moment of installation, preventing interception during transfer. Once installed, the eSIM is ready for use abroad without needing further downloads.
- Scan a QR code or tap a carrier app link while connected to Wi-Fi to initiate delivery.
- Ensure your phone stays within Wi-Fi range until the profile finishes downloading—interruptions can corrupt the install.
- Delete the eSIM profile later via settings if you need to re-download it for a trip extension.
Why Switch to a Digital SIM for Your Next Trip Instead of Roaming?
Switching to an eSIM for travel eliminates the shock of roaming bills by letting you purchase a local or regional data plan before you depart, often at a fraction of the cost. Unlike physical SIM cards, you can install the digital profile instantly, avoiding airport store queues and the risk of losing your primary SIM. With an eSIM for travel, you can keep your home number active for calls and SMS while using a separate data line, ensuring you never lose access to banking or two-factor authentication. Best of all, you can switch providers on the fly if coverage is weak, and your phone stays locked to your current carrier without needing an unlock code—giving you complete control over your connectivity the moment you land.
Saving Money on Overpriced Carrier Roaming Fees
Carrier roaming fees often cost several dollars per megabyte, turning a simple map check into a bill shock. An eSIM sidesteps this by letting you buy a local or regional data plan at destination prices before you land. You pay a flat rate for a set data allowance, usually a fraction of what your home carrier charges for the same usage. This direct comparison makes overpriced carrier roaming fees avoidable entirely. Choose a plan that matches your trip length and data needs, then activate it on arrival—no physical SIM swap required. This way, your budget stays predictable, and you only pay for the data you actually use.
- Compare eSIM data-only plans against your carrier’s per-day or per-megabyte roaming rates to see immediate savings.
- Top up a small eSIM data pack instead of accepting your carrier’s automatic high-cost roaming add-on.
- Keep your home SIM active for calls/SMS but disable data roaming, routing all data through the cheaper eSIM.

Keeping Your Home Number Active for Calls and Texts While Using a Local Data Plan
Keeping your home number active for calls and texts while using a local data plan requires a deliberate separation of functions. Your physical SIM remains locked to your carrier for voice and SMS, while your eSIM supplies the local data. This setup prevents roaming fees on your primary line, but you must disable data roaming on the physical SIM in your phone settings. Calls and texts still arrive on your home number, though iMessage and WhatsApp will use the eSIM’s data unless you manually assign them to the physical SIM for sending. Dual SIM management is essential to avoid accidentally charging international rates.
- Set your physical SIM to “No Data” or “Data Off” to stop background usage.
- Assign voice and SMS defaults to the physical SIM for uninterrupted service.
- Check if your carrier offers Wi-Fi calling over the eSIM’s data to reduce costs.
Installing Your Plan Before You Even Board the Plane
The core advantage of an eSIM is that you install your travel plan before departure, while still on Wi-Fi at home. You scan the QR code or enter the activation details into your phone’s settings, and the profile downloads instantly. This process takes less than five minutes, eliminating any need to find a local store or airport kiosk upon arrival. Once installed, the plan sits dormant until you land and disable airplane mode, at which point it automatically connects to the local network. You can even verify the connection status in your settings before you leave, ensuring zero surprises when you step off the plane.

How to Pick the Right Travel Data Plan for Your Destination
To pick the right eSIM plan, first match the coverage zone to your exact itinerary—a single-country plan beats a regional one if you stay put, while a multi-country plan saves money if you cross borders. Check the data allowance against your actual usage: streaming and maps burn through gigs fast, so estimate daily consumption, then add 30% buffer. Next, verify the plan’s validity window aligns with your travel dates; avoid paying for 30 days when you only need seven. Prioritize plans offering a local APN and automatic carrier selection to dodge manual settings.
Always read the fine print on tethering and speed throttling—cheap plans often cap hotspot use or drop to 3G after a soft limit.
Finally, confirm the eSIM activates on arrival, not at purchase, so your plan’s clock starts when you land, not when you book.
Data Allowance vs. Trip Length: How Much Do You Really Need?
Matching your data allowance to trip length prevents both overpaying and running dry. For a weekend city break, 1–2 GB usually suffices if you rely on hotel Wi-Fi. A one-week trip with heavy navigation and social media demands 3–5 GB, while two weeks of remote work or streaming can easily consume 10 GB or more. Before buying, estimate your daily usage—map apps use ~5 MB per minute, video calls ~1 GB per hour. Choose a plan with a buffer of 20–30% above your calculated need, since unexpected uploads or downloads occur. For longer stays, consider a multi-cycle plan or top-up option rather than a single large allowance you might waste.
- Track your current data usage in phone settings to estimate a realistic daily baseline.
- Select a plan with rollover data if your trip spans two billing cycles.
- Prioritize offline downloads (maps, guides) before departure to stretch your allowance.
- For trips over 30 days, compare monthly recurring eSIM plans vs. fixed-allowance packages.
Regional Plans vs. Single-Country Plans vs. Global Coverage Options
When choosing an eSIM, your coverage scope directly impacts cost and reliability. A **single-country plan** suits a one-nation trip, offering the lowest price and fastest local network speeds. A regional plan covers a cluster of nearby countries (e.g., Europe or Southeast Asia), balancing convenience and value if you cross borders, though per-day rates are slightly higher. Global coverage options work across dozens of nations, but they often throttle speeds or cost more per gigabyte. For multi-country itineraries, regional plans usually beat global ones in price, but verify that every stop is included before buying. Match the scale to your itinerary, not your potential wanderlust.
5G, 4G LTE, and Coverage Quality—What to Look For in a Provider
When evaluating travel eSIMs, prioritize coverage quality over raw speed, as a stable 4G LTE connection often outperforms patchy 5G in rural or transit zones. Check the provider’s network partnerships—those piggybacking on primary local carriers offer broader fallback coverage than those relying on a single tower operator. Compare the destination’s actual 5G rollout map; in many regions, 5G is confined to city centers, making 4G LTE the default for long drives or island hopping. A provider advertising “5G-ready” may still throttle your speed after a data threshold, so scrutinize fair-use policies. Finally, read recent traveler reviews for specific cities or provinces, since coverage maps frequently overstate actual signal strength in dense buildings or mountainous terrain.
Step-by-Step Guide to Setting Up and Activating Your Digital SIM
Before departure, confirm your device is carrier-unlocked and check eSIM compatibility via your phone’s settings menu. Purchase a travel plan from a provider like Airalo or Holafly, then scan the emailed QR code or manually enter the activation code. Follow on-screen prompts to label the eSIM (e.g., “Japan Data”) and set it as your cellular data line. Once landed, toggle the eSIM on and ensure roaming is enabled for your plan; the profile installs instantly, but if it fails, restart your phone or re-download the profile from your account. **Pro tip: always download the eSIM profile while on Wi-Fi before you leave home**—activation requires an internet connection, and airport Wi-Fi can be unreliable. Q: What if my eSIM doesn’t activate after scanning? A: Delete the failed profile, reboot, and re-scan; if it still fails, contact your provider’s support chat—they can push a new QR code live.
Checking If Your Phone Is Unlocked and eSIM-Compatible Before You Buy
Before purchasing any travel eSIM, confirm your phone is **carrier-unlocked and eSIM-compatible** to avoid wasted money and setup frustration. Check your device’s settings under “General > About” (iPhone) or “Connections > SIM manager” (Android) for an “IMEI” or “EID” number—if you see EID, eSIM support exists. Then verify unlock status by inserting a different carrier’s physical SIM; if it works, you’re clear. Skip this step, and you risk buying a data plan that simply won’t activate.
- Use your phone’s dialer code *#06# to reveal both IMEI and EID instantly.
- Contact your current carrier to permanently unlock the device if it’s still locked.
- Visit the manufacturer’s official spec page to confirm eSIM support for your exact model number.
Scanning a QR Code vs. Manual Installation: Both Methods Explained
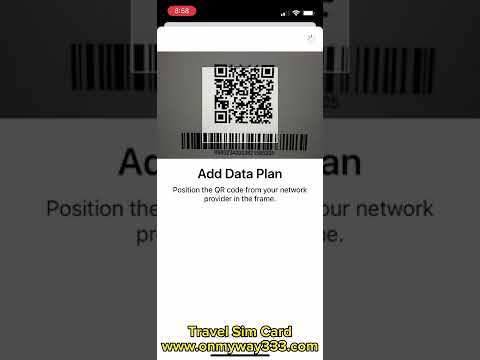
When activating your travel eSIM, **scanning a QR code vs. manual installation** comes down to speed versus control. QR scanning takes under a minute: open your camera, point it at the provider’s code, and the profile auto-downloads with all APN settings configured. Manual entry, however, is your fallback when the QR fails, prints poorly, or you’re on a device without a camera—you’ll type the SM-DP+ address and activation code into your phone’s cellular settings. For most travelers, QR is the clear winner; manual is only worth the extra typing if you need to verify each detail yourself.
- QR scanning requires a stable internet connection; manual does not.
- Manual installation lets you retype codes from a confirmation email if the QR is blurred.
- Both methods store the same eSIM profile, but QR is less error-prone for beginners.

Switching Between Multiple eSIM Profiles and Your Physical SIM
Switching between multiple eSIM profiles and your physical SIM is managed through your device’s settings, not by removing hardware. In the cellular or mobile data menu, you can designate a default line for data, calls, and messages, but for travel you’ll often toggle the active data line directly. When you land, enable a local eSIM profile and set it as the primary data source, while keeping your physical SIM active BazTel eSIM cards for SMS or banking verification. Managing active eSIM profiles for travel requires disabling unused profiles to prevent accidental roaming charges; a profile remains installed but dormant until activated. Always label each line clearly (e.g., “Home SIM,” “Japan eSIM”) to avoid confusion when selecting a network.
- Turn off data roaming on the physical SIM before enabling a travel eSIM.
- Use “Allow Cellular Data Switching” only if your device supports seamless fallback.
- Keep your physical SIM active for two-factor authentication, but block background data.
- Restart your phone after switching profiles to force a clean network re-registration.
Common eSIM Pitfalls and How to Troubleshoot Them on the Road
The biggest roadblock travelers hit is assuming their eSIM activates the moment they land, only to find zero bars. Always install and test your eSIM before leaving home. If you land and data fails, toggle airplane mode on and off—this forces the phone to reconnect. Another classic: your eSIM shows “No Service” because data roaming is toggled off, not because the plan is broken. Turn on data roaming specifically for that eSIM line. If you’re stuck in a dead zone, manually reselect the network (Settings > Cellular > Network Selection) instead of waiting. Finally, if the plan says “expired” but you just bought it, double-check that your phone’s date is automatic—a wrong clock blocks activation. Q: Why does my eSIM work but drain battery? A: It’s scanning for towers; switch to a local APN or disable auto-scan. Reboot fixes most glitches.
What to Do When Your Data Isn’t Working Even Though the eSIM Is Active
Even with an active eSIM, dead data usually means your phone locked onto the wrong network. First, toggle airplane mode for 30 seconds to force a re-registration. If that fails, manually select a local carrier in your network settings, bypassing the automatic roaming pick. Next, check your APN settings—many travel eSIMs require a specific APN (like “internet” or “bic”) that isn’t auto-filled. For iPhones, update carrier settings via “About.” On Android, reset network settings but keep the eSIM profile. Finally, if you’re in a dead zone, walk toward a window or plaza. **Priority re-registration beats rebooting your phone**—attempt network rescan first. Only as a last resort, delete and re-download the eSIM profile using your provider’s QR code. Most issues resolve within minutes.
Mistakes to Avoid When Buying a Plan (Expiration Dates, Tethering Limits, and Fine Print)
When buying an eSIM, never assume the plan activates the moment you land—expiration dates often start from purchase, not first use, so a pre-loaded plan can die before your trip begins. Check tethering limits too, since many budget eSIMs throttle or block hotspot sharing, leaving your laptop useless. Finally, read the fine print for data speed caps after a fair-use threshold, which can turn “unlimited” into 128kbps purgatory. Always verify activation windows, hotspot allowances, and refund policies in the terms before paying.
- Confirm the validity window matches your travel dates
- Test if the plan allows personal hotspot
- Scan for speed reductions in the tiny print
Skipping these steps means wasted money and offline frustration.